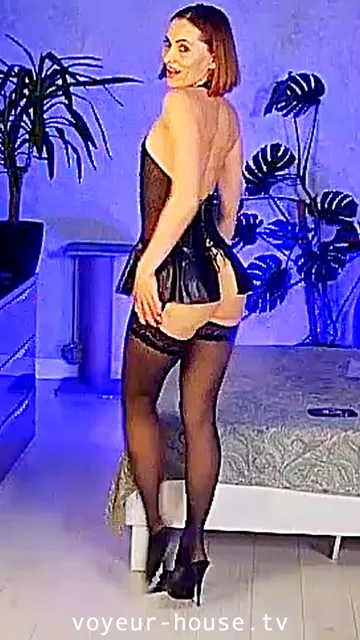
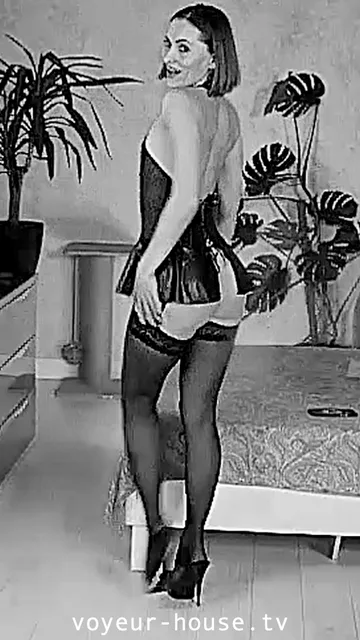
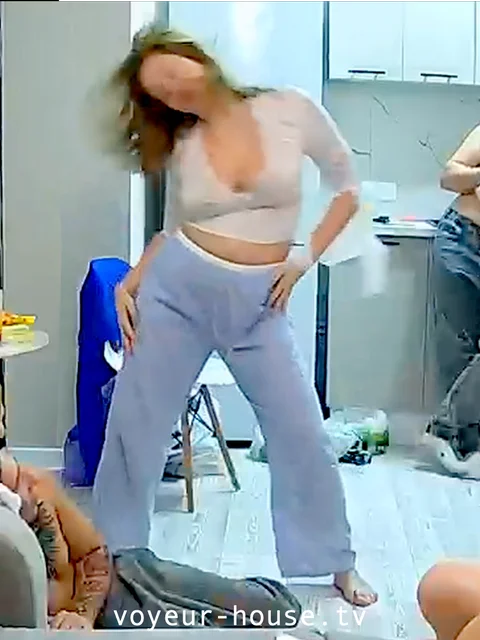
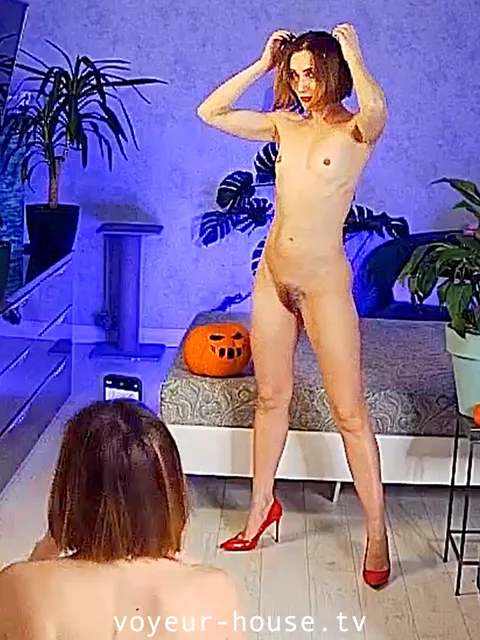
A day in the life.
2 Likes
Wow. That is a very interesting video to watch.
First of all, by the little activity on your account it seems you have not posted this video in any other topic. I think you should do so, because I’m not sure how many views it will get in this topic; probably not as many as it deserves. As it doesn’t really fit into any one of the single apartment topics, best create a General Discussion topic like “A Day in te Life of VHTV” for it.
Can you tell us something about how you made this? How random or planned was the recording and selection of the footage. It doesn’t seem very random. How much more footage did you record, and how long did it take you to edit this?
I noticed there is much continuity in the time codes, but always with little gaps between them. So I wonder, are parts of it real time recorings of how you just surfed along, with the transitions cleaned up? Did you bookmark the cameras you wanted to visit?
Questions, questions, questions. The point is I’m intrigued and would like to know more.
Good work, really.
Thank you! That means a lot coming from you.
I’ve taken your suggestion of posting it in a new topic. We’ll see what comes of that.
As for how I did it, it’s basically, as you suggest, a BandiCam capture of me surfing the VHTV free cams. I captured four sessions for a total of about 29 minutes and edited out the less interesting footage with OpenShot. Most of the clips appear in the same order in which they were captured, although I did move a few where that seemed to make a smoother transition.
Once I had the full-screen version rendered into a single file, I used ffmpeg to crop and resize the viewing pane into a stand alone file.
So you got rid of the bandicam logo by capturing your full computer screen and the logo was in the part that you cropped away. That’s a trick more bandicam users should adopt. Or are you using the paid version without logo?
I don’t know OpenShot, but in ShotCut I would just put one “Size, Position & Rotate” filter on the whole track and export the cropped video in one go, instead of processing the rendered video through a second program. Seems more practical to me, to do everything in one program. But I have no experience with the programs you are using, so I can’t really judge how efficient or inefficient your process is.
I really like how you arranged the musical bits in the first minute, that gives the video a good hook to engage the viewer. Wouldn’t be surprised if it took you particularly long to figure out the exact sequence of clips there.
VHTV freecams → free Bandicam → free OpenShot → free ffmpeg. See a pattern here?
Actually you may be using ffmpeg without knowing it. FFmpeg is a command line program that nearly all GUI video editors, especially the free ones, use under the hood. The GUI lets you describe the output you want and then feeds that description to ffmpeg which does the hard work of modifying the input.
The arrangement of the clips was determined almost exclusively by the timing of my surfing. The musical clips at the start just happened to be among the first captures. The clip of Miki is slightly out of place as is the second clip of Draca and the second clip of Rosy. And of course the beginning and ending shots of Myra. That’s about it. Most of my time was spent deciding which portions of the clips could go and which should stay.
I like ffmpeg for cropping because when I try to crop with a GUI I’m always off by a few pixels. The command line gives me pixel level control over cropping.
Antwan:
I have a video 1920 x 1080. I want to create a video from it preserving the pixels from x,y = 268, 190 to x,y = 1636, 959. The final result should be 1280 x 720 25fps. How would I do that with ffmpeg?
(Google) AI Overview:
To create your video, you need to use FFmpeg’s crop and scale filters in a single command, chained together. First, you will calculate the dimensions of the area to be cropped. Then, you will specify the desired output resolution and frame rate.
Step 1: Calculate the crop dimensions The FFmpeg crop filter syntax is crop=w:h:x:y, where w is the width, h is the height, and x and y are the top-left coordinates of the crop area.
Width (w): The difference between the max and min x-coordinates.(w=1636-268=1368)
Height (h): The difference between the max and min y-coordinates.(h=959-190=769)
Top-left x-coordinate (x): The starting x-coordinate.(x=268)
Top-left y-coordinate (y): The starting y-coordinate.(y=190)
Step 2: Combine the crop and scale filters The complete command will chain the crop filter with the scale filter, followed by the frame rate option.
sh
ffmpeg -i input.mp4 -vf “crop=1368:769:268:190,scale=1280:720” -r 25 -c:a copy output.mp4
Command breakdown:
ffmpeg -i input.mp4: Specifies the input video file, input.mp4.
-vf “…”: Initiates the video filtergraph. The filters are separated by a comma.
crop=1368:769:268:190: Crops the video to a width of 1368 and a height of 769, starting at pixel coordinates 268, 190.
scale=1280:720: Resizes the cropped video to the final desired resolution of 1280x720.
-r 25: Sets the output video’s frame rate to 25 frames per second.
-c:a copy: Copies the audio stream directly without re-encoding, preserving the original audio quality.
output.mp4: Specifies the name of the output video file.
1 Like
Yes, I think I heard before that Shotcut also uses ffmpeg internally, though, to be honest, I don’t really care that much about what goes on under the hood.
ShotCut is also free.
And it gives you single pixel and single frame precision in all the things you do. For the filters where you may point and drag a rectangle on the preview screen, you can also enter precise numeric values. And in the preview window you can zoom in to 1000% and check your corners for what is or is not in your exported frame.
Though, what I think it can not do is just using the unmodified audio or video stream of a source file. I think by its very nature, since you can use multiple sources in a project, it always has to make a new encoding.
I will try ShotCut soon. Given that display quality degrades slightly with each render, if I can get pixel-level cropping with one render instead of two that is definitely worthwhile.
it makes it easier for you as tools like that just calculate for you and build the command for ffmpeg. and you can see the result of zoomimg, cropping, positioning in a preview. you can change/set the output format when opening a new project, for example 1080x1920 (19/6) for smartfon, and match the part of the vid to that by just using the mouse to zoom, position and so on.
and in addition you have a lot of filters to manipulate the pic, you can change the appearence (colors,lightning, etc.) also all shown in a preview.
just look on utube some tutorials to see what you can do with it. ![]()
One trick I sometimes use to create a somewhat fluid animation loop, even when the girl’s poses don’t match up at all at he beginneng and end of the clip, is to look for a “patch bit” to get her from the end pose to the start pose again. Sometimes that patch bit is a snippet of footage that is running in reverse. For explaination, here I turned the patch bit of the above gif black and white. It is a piece of the longer clip which is running in reverse and at 1.5x speed. Even if the poses don’t match completely, if you look for the right moments to cut you can get a somewhat fluid end result.
I don’t have the project files of this next one anymore, but there’s also a quick reverse bit to get Swera back into upright position.
1 Like
Four of my Halloween videos so far:
-
The banshees are made by AI (Veo3). I edited the clip a bit and used Rosies body on the one in the middle. I used several videos above each other and played around with the settings for blend modes as well as for opacitiy. I also used an animated mask for morphing Rosies body on the banshee in the middle. There is also a lot of color changing made to Rosies body to make her look more ghostly and make her blend in with the others. The ending is made with AI generated sounds (Banshee scream) and the mouth for biting is a sticker I found. This video does not look very complicated but it took nearly 3 hours to get everything right: 👻 Halloween 2025 👻 - #37 by jabbath1987
-
This one I used a ghost from a video clip I had and used the “Chroma Key” function to only get the ghost itself. I changed the colors to make it look like a demon and let it appear out of the wall (Using the opacitiy settings) where the bat is. I used a lot of keyframing to make the demon move towards Aleks and let him disappear into his head (Again using opacitiy settings). As a sign of possession I made his eyes black and let a pentagram appear on his shoulder.
I also used some creepy sound effects. Some of them generated by AI. This took me about 3 hours: 👻 Halloween 2025 👻 - #45 by jabbath1987 -
For this one I had help from Draca who did the acting. As preparations I got the scene from Ghostbusters from Youtube and got it into a size and format usable in my video. I also got the growling audio of the “Zuul Dog” from the movie to use it in my video. I had to edit the audio a bit so the loud sounds of Dana in the movie unpacking her shopping bags are not audible. It was important for me that my video will be close to the movie. So I added with some video overlay the eerie shine around the fridge and then the growling which makes Draca go to the fridge and open it. For the appearing of Gozers temple and Zuul I used a technique called “Planar Tracking” This means you define an area somewhere and the function will track this area. (In this case the open fridge) I then assigned the Zuul video to the tracked area. Now the video will stay in place there. But now I need a moving mask so the video will gradually appear when the fridge is opened and disappear when Draca closes the fridge. When the fridge is closed a bit of smoke as an effect was added. After that two lighning strikes as effects got added to the window to the loggia as well as the screen of the TV is breaking. The sound of a ligthning strike generated by AI and in the end a flickering lights effect is finishing the video. This was a very complicated video to make and it took me nearly 5 hours: 👻 Halloween 2025 👻 - #49 by jabbath1987
-
Inspired from the “Ghostbusters” movie I wanted to also give Vigo from “Ghostbusters II” an appearance. I picked Mariyas apartment as she has a fitting painting to put our friend Vigo on. I got the video from Vigo in the museum from Youtube but I had to cut it a bit and also modify the audio as there is also annoying Janosh talking who I did not want to have in my video. Once the Vigo video was completed I used the “Planar Tracking” function again to put him into Mariyas painting. I added a sound effect for the energy beams from the eyes and also some video distortion at the end of the video. This video took only about 2 hours to make: 👻 Halloween 2025 👻 - #51 by jabbath1987
1 Like
the blend mode often works much better than chroma key. that’s why i like to use things with dark background. it’s easy to find the right mode. just a little bit brightness adjustment sometimes.
1 Like
That is true. And sometimes you need a combination of both.
1 Like
Very cool videos, Jabbath. Oh great, while you are all employing the latest tech, I’m still figuring out how to animate masks by hand. Human stupidity instead of artificial intelligence. And I’m definitely not going to disclose how long I’ve been tinkering on this little animation here. It was a little more complex than it might seem at first glance. I actually wanted to hold this back 'til friday, but only a handful of nerds read this topic, anyway. On Halloween the Great Pumpkin has a Clara for everyone…
Oh, and regarding Ghostbusters, maybe the ghost blowjob scene is something that could be adapted using VHTV footage.
@NaggeDanseGanseDaag Damned, I wasn’t even aware of blend mode. Another interesting filter to play with.
3 Likes
Kudos. Especially in terms of the effects, this is the best work I’ve seen from you so far. The result looks professional. And I like the pumpkin, too. ![]()
All my masks are animated manually (by hand). I do not think that AI can do that anytime soon.
The proggram that is integrated into Shotcut for this, Glaxnimate, isn’t all that great, but I think I’m more or less getting the hang of it now.
I never tried Shortcut. It’s mobile only?
No, there’s another mobile app that infuriatingly uses the same name, only with a capital C, I think. It’s Shot, not Short. I’ve linked Shotcut here so often, it’s free, multi-platform, and I use it for all my stuff here.
1 Like
The user interface looks a bit dated to me. But I am used to the very clean UI of Filmora for years by now. So I think it’s just a matter of taste.
I did not do much with Filmora. So about the use and results of Filmora i have not really experience to compare both. But it has very similar funtionality. Shotcut has no AI features (Addons, Plugins) yet (as i know).
1 Like